Sunday 20 September 2015

The heat is(n't) on!

Many ages ago I found that there was a solid pipe coming up from the offside heater channel, where the flexi hose type stuff should have been.
I attached a hose to said pipe and then attached that hose to the plastic vent malarkey (technical term) hoping to get some windscreen demisting action going on... it didn't work!
Today I found out why!

This is the solid pipe...

Somewhere a vacuum cleaner is missing an attachment
And this is the weirdly melted and not very well attached to the heater channel hose that the solid pipe was totally failing to be attached to!

That poor vacuum cleaner! How was it supposed to do under the sofa?!

Oh yes, nearly forgot, this is the front of the offside heater channel that the melted hose was badly attached to and the solid pipe wasn't channelling heat towards the windscreen from!

It just came off in my hand (that's what she said!)

The Incredible Bulk(head)

Decided to tackle the bulkhead cross piece, so I can get the front of the body to the actual height it's supposed to be and not where Bodge decided it should go!

The fact that the centre of it had collapsed was a sure indication that something was a tad wrong...

Ignore the brake fluid, that's just seasoning

And the badly welded bit in the middle inspired confidence... confidence in what I'm not quite sure but it certainly wasn't in the structural integrity of the car :P


There was something nicely satisfying about ripping the cruddy piece of rot encrusted metal out :)

That's a nice repair in the middle of something that helps hold the front end up!


And I finally got rid of the zip tie that had been put there to stop the clutch cable coming too far forward, rather than just make a stop plate...


I took the cable off the pedal and actually made the aforementioned stop plate, but never got round to cutting the zip tie off :P

Then I tried to trial fit the new cross piece... it wouldn't fit as the front is STILL not high enough!!!
(I forgot to take a pic but just imagine a piece that's meant to fit somewhere not fitting where it's supposed to)

I had some excitement too, when a cutting disc decided that it would rather be a piece of abstract art!


Friday 18 September 2015

You know the drill...

Drilled about 50 holes in the edge of the floorpan, twice! Once with a thin drill bit, then again with a larger one... made my wrist ache like an achey thing!


Then I had to get the remaining bits of the old floor off... breaking spot welds is a thoroughly exciting job :P


Did a trial fit of the floor...


And then squeezed the heater channel in!


Had a horrible thought... when I've finally finished this side I still have another side to do! ;)

Tuesday 15 September 2015

Waterloo!

I took the brand new Napoleon's Hat (or as a friend called it "Nelson's Helmet" :P)...


...and hacked an end off as it's the only bit that needs replacing!

Not the prettiest of welding but it's solid, and will probably look better after a clean up... which has to be later as it started raining just after I'd finished this bit!
Welders/grinders and rain don't play well together ;)

Friday 11 September 2015

A Beetle Beetle...

Found this little fellow on one of the tyres :)


Arch enemy...

Put the rear quarter/wheelarch repair panels on to see what they look like...


...very nice :)

Unfortunately I had to move the rear shock to fit the arch panel in, and the high tensile top bolt snapped!

That's just effing marvellous!

It's a frame up!

I cut all that lovely rot out of the frame head plate and napoleon's hat...


Well I say cut it out, most of it just fell off! 

Then I got the very nice new frame head plate... and cut a piece off :P

 
I started welding said piece in place, but the wire feed was erratic and it kept jamming in the welding tip!


Turns out that the tip is cream crackered... new tips on the way... but at least it's there ready for finishing


Let Mortal Kombat begin!!!

After a brief (well a couple of months is brief!) break, due to reasons I won't go into here, I'm back in the repairing tournament :)

Sunday 14 June 2015

Indiana Bodge and the Rear Wheel Arch of Doom...

Before I get on to the tale of the wheel arch, here's a shot or two of the crossmember trial fitted...
It's nice to see some solid metal, even if it's not welded in yet :P

And now for our main feature!

I can't remember if I showed this bit...
That's where I put a hammer through the wheel arch on the inside!

This is where I put a hammer through the wheel arch on the outside ;)
I may have put a hammer through both sides of the rear wheel arch, and there may be a hole all the way through, but it wasn't the same piece of metal... Bodge had been at it again!


I'm not entirely sure how many layers there are, but it's more than two!
And this is what I took out...
It's the Book of Wheelarch :P

Thought I'd do a trial fit of the rear quarter panel against the crossmember, just so I could end the day with some hope ;)
The quarter panel can't go in far enough yet as there's still some of the old metal to cut out...

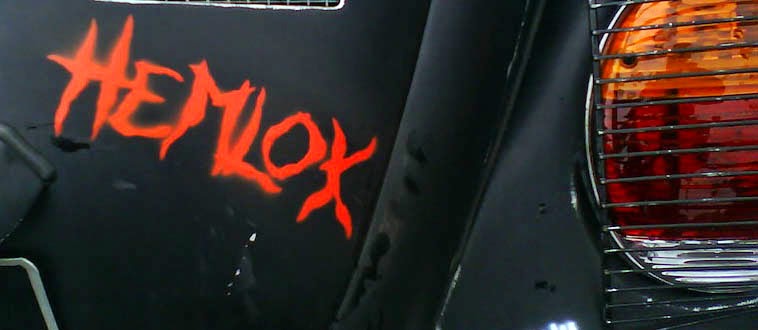
And to finish on a different topic... I can't find the stencil I made for my Death Race logo, so I just cut it out of the old rusty wing and I'll rivet it onto the new one :)


Sunday 7 June 2015

Anything silver is from the future!

This is the length I originally cut the pipe...
 

But with these on the end it was too long, and Constable Doppler may have had something to say about how far out they stuck...

So I had to cut them down a tad...
Only a small difference ;)

Welding it on at the right angle was 'fun'... and the small piece of very hot metal that went into my glove was even more 'fun'!

But I think I managed to get both sides to match... and if they don't then it's just hard cheddar! :P

Then it was time to wrap it up (I'm available for present wrapping, reasonable rates)

And the piece of resistance... painted it silver with some of that lovely high temperature paint from Frost :)

It looks a lot chunkier and meaner than it used to, I like it! I just hope it sounds good, but I can't find that out as I can't start the engine yet... due to someone cutting the wiring loom ;)

Friday 5 June 2015

Exhausted...

Just after I'd got my member out (oooer missus!) I had a visitor...

By the time I'd done the work on the new crossmember my visitor (not even my cat!) had obviously got so tired out with the hard labour that he fell asleep :P
Everybody needs a floorpan for a pillow!

With me being a softy (anybody spreads that information and I'll hunt you down!) I couldn't bring myself to shift the big lump... so I got on with my 'custom' exhaust (an essential part of the rebuild...not!)

My spare exhaust had spent a year sat outside, most of the time in a puddle, so wasn't in the best of conditions...

The other end had rusted through and fell off, but I forgot to take a photo so you'll just have to use your imagination... it was a bit like this, only worse, with holes in it, a bit like a brown swiss cheese :P

My plan was (I'll explain why it's "was" in a moment) to cut the rotten part out, turn the pipe around, weld the tailpipe on the end... unfortunately when I tried it for size, luckily before welding anything, I discovered that the tailpipes would be sticking out at least 12 inches behind the car! Oopsy ;)
 I've cut the pipes shorter, but again forgot to take photos, so you'll have to make do with a pic of the silencer being cleaned...
 
I'll take the pics of the shorter pipes/etc if it stops raining today!


Dis-crossmember-ment...

Finally, some decent weather!

So I cut the rear crossmember out (mostly)...


The new piece is nice and solid (of course) but doesn't come with the holes for the floorpan bolts or the captive nuts for the heater tube... and the hole for the tube is slightly too small!
Oh flipping joy :P

So I drilled some bolt holes...

Then ground the back of the captive nuts on the old crossmember until they fell off (the professional way)...

And welded them to the new crossmember (after drilling holes for the bolts)...

Took me a while to get used to the welder again...

I also enlarged the hole for the tube using my amazing file... most people call it a drill ;)
Just put the bit against the area to 'file', pull the trigger, and waggle the drill around :P

All done :)

One day I may get a new tube, but today is not that day as they're too flaming expensive! I did think about sticking a toilet roll tube through there, or maybe kitchen roll as they're bigger, I'm sure that would work...  I'm surprised Bodge hadn't already done it ;)